Now ArcGIS map is on your mobile device, what can you do next?
Examples of using mobile maps while working in the field.
Onsite work with map, data collection, importing collected data to ArcGIS
Now, with your ArcGIS map on your mobile device (see more details on how to do this in the ‘How to create interactive mobile map in 5 easy steps’ guide) you are ready to use it in the field.
Onsite work with map
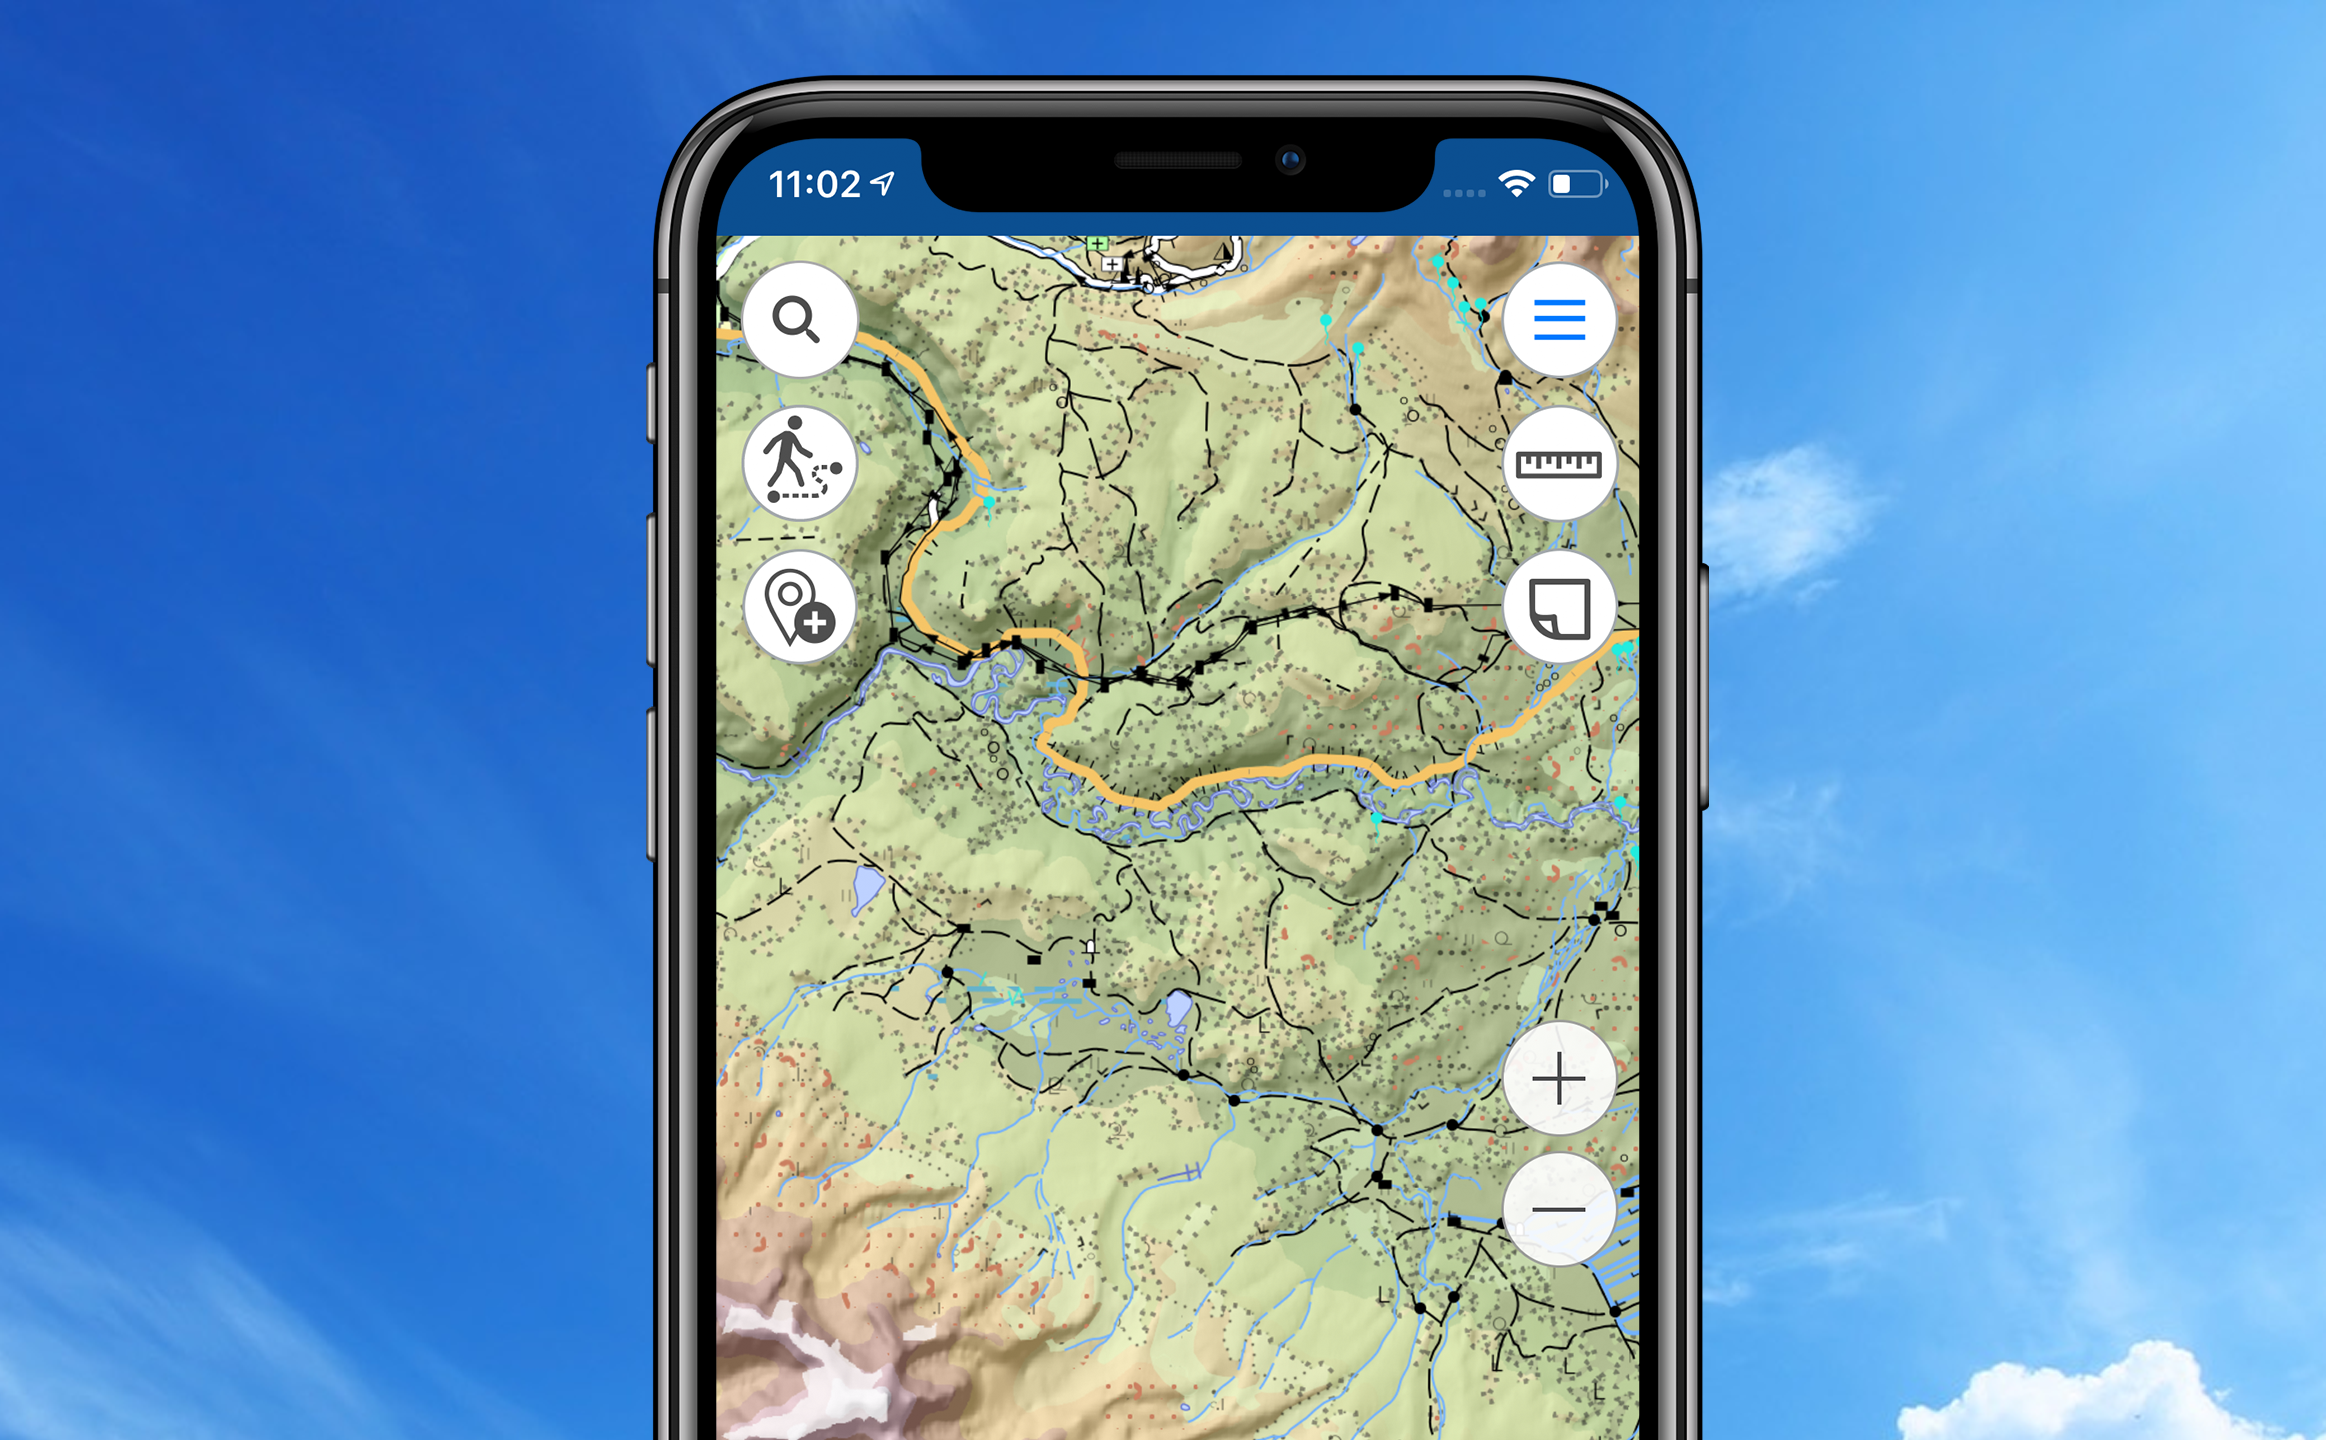
Finding bearings offline even in remote locations is one of the most useful CarryMap features. With mobile map on your device, you have all your data stored locally, so no internet is needed to use your map onsite.
With CarryMap you can always see your current location, just open your mobile map and tap ‘My location’ button, your current location will be shown on the map. If you need to know the distance to the next point of your route or calculate a plot area, use the ‘Measure’ tool. To do so, tap the context menu button at the top right corner of the map, select what you need to measure, and draw a line or a polygon, respectively – the measure result will be displayed on the screen.
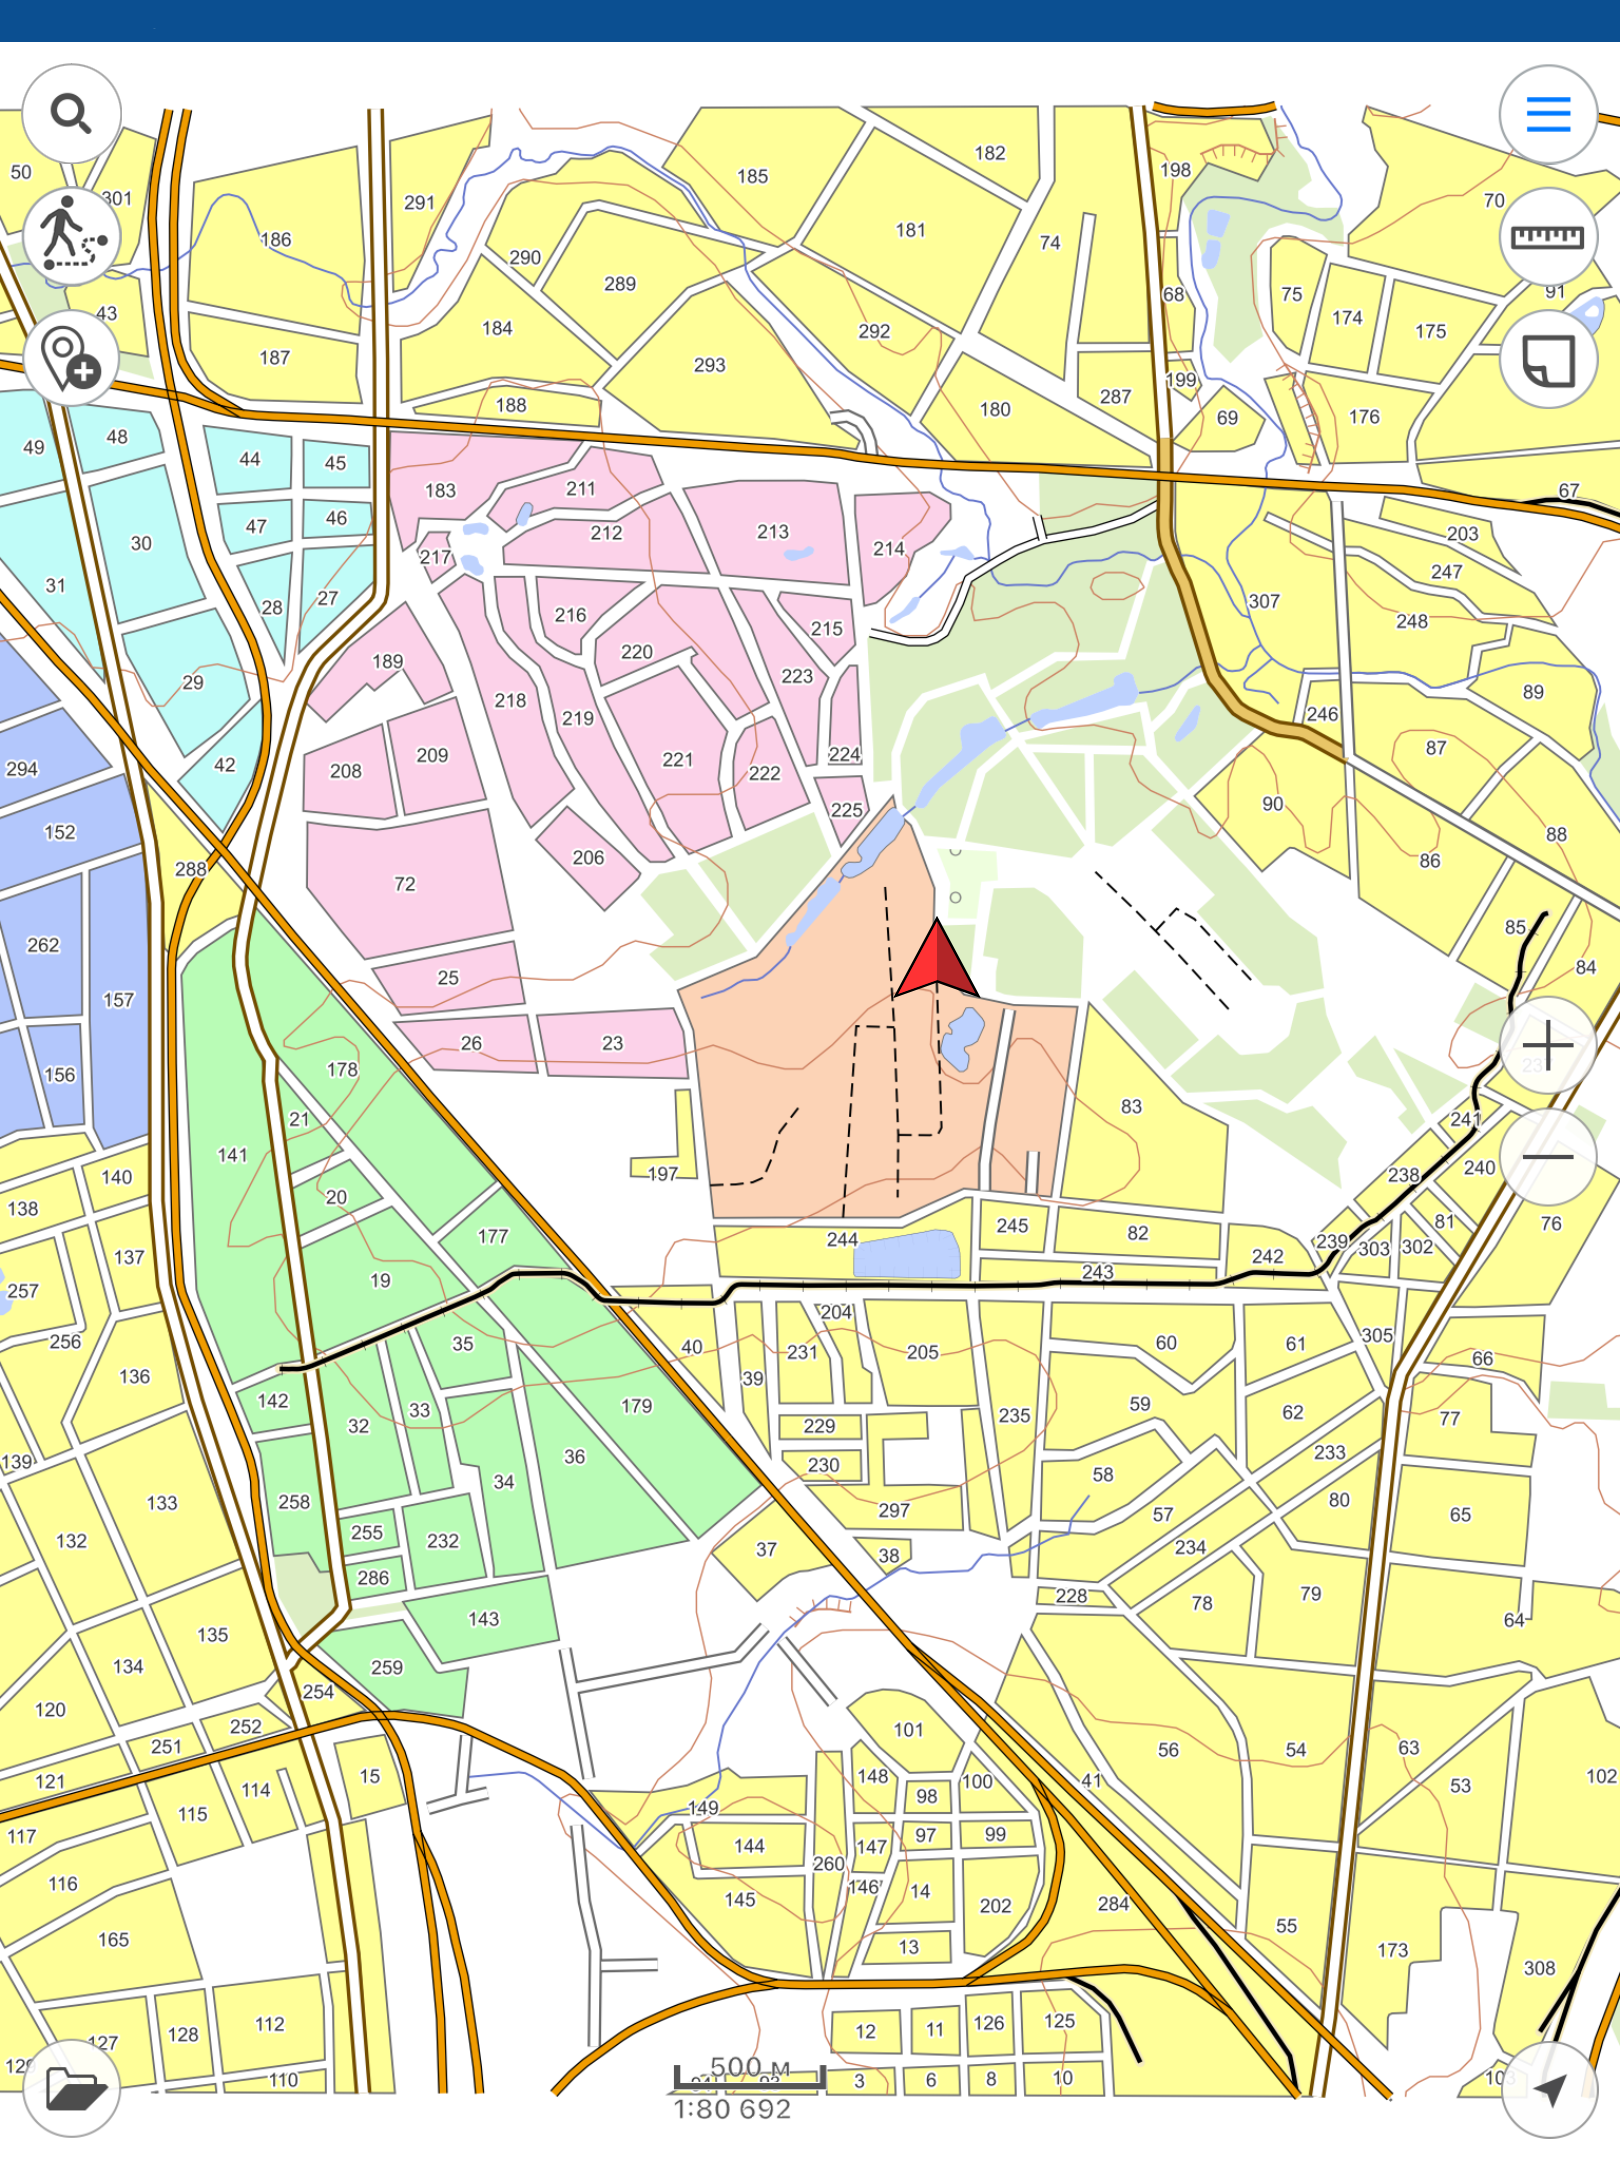
Using the GPS positioning system of your mobile device, you can record your GPS tracks and display your current route on the mobile map. Note that recording GPS track and creating polygon by track can be done in the background mode, so you will be able to use any other app options during the both processes.
Data collection
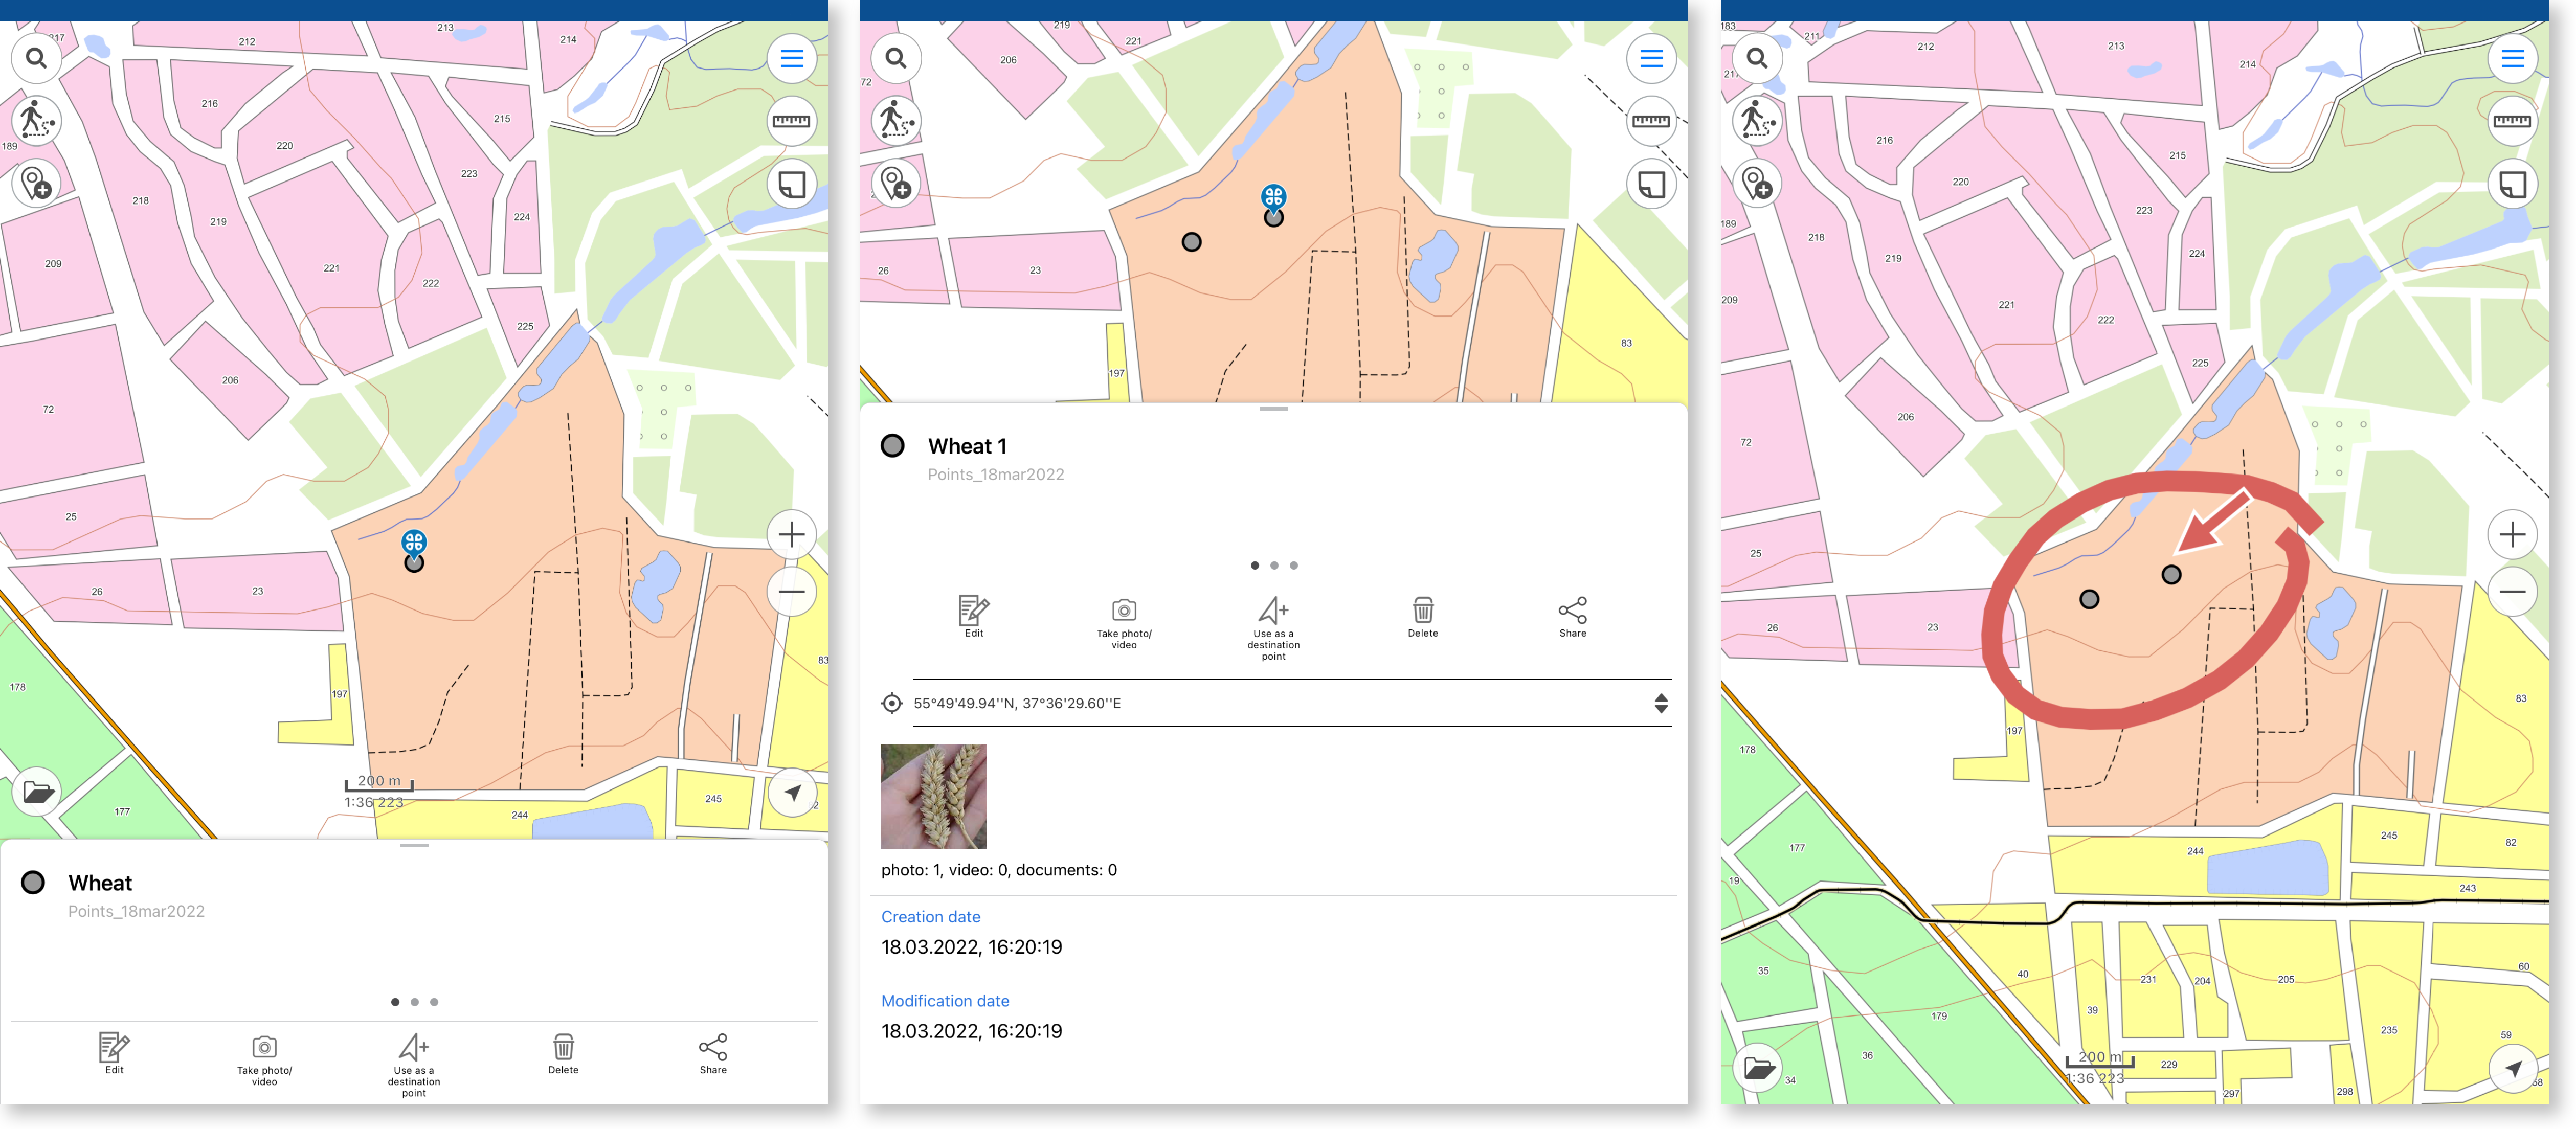
You can create new features as points, lines and polygons on your mobile map. Enter the feature name, fill in the Description and add an attachment as a media file. Created features can be edited, for example, by changing location of the existing vertexes or by adding the new ones for lines and polygons. You can add a point feature on your map using your device camera. To do so, select ‘Create point by photo’ tool, take a photo of the site or download the existing photo from your gallery and the feature location will be defined based on the photo coordinates. Adding arrows or drawing free hand graphic on the mobile map, you can mark the places and the features you need to remember or which you want to show your colleges.
Export collected data from CarryMap
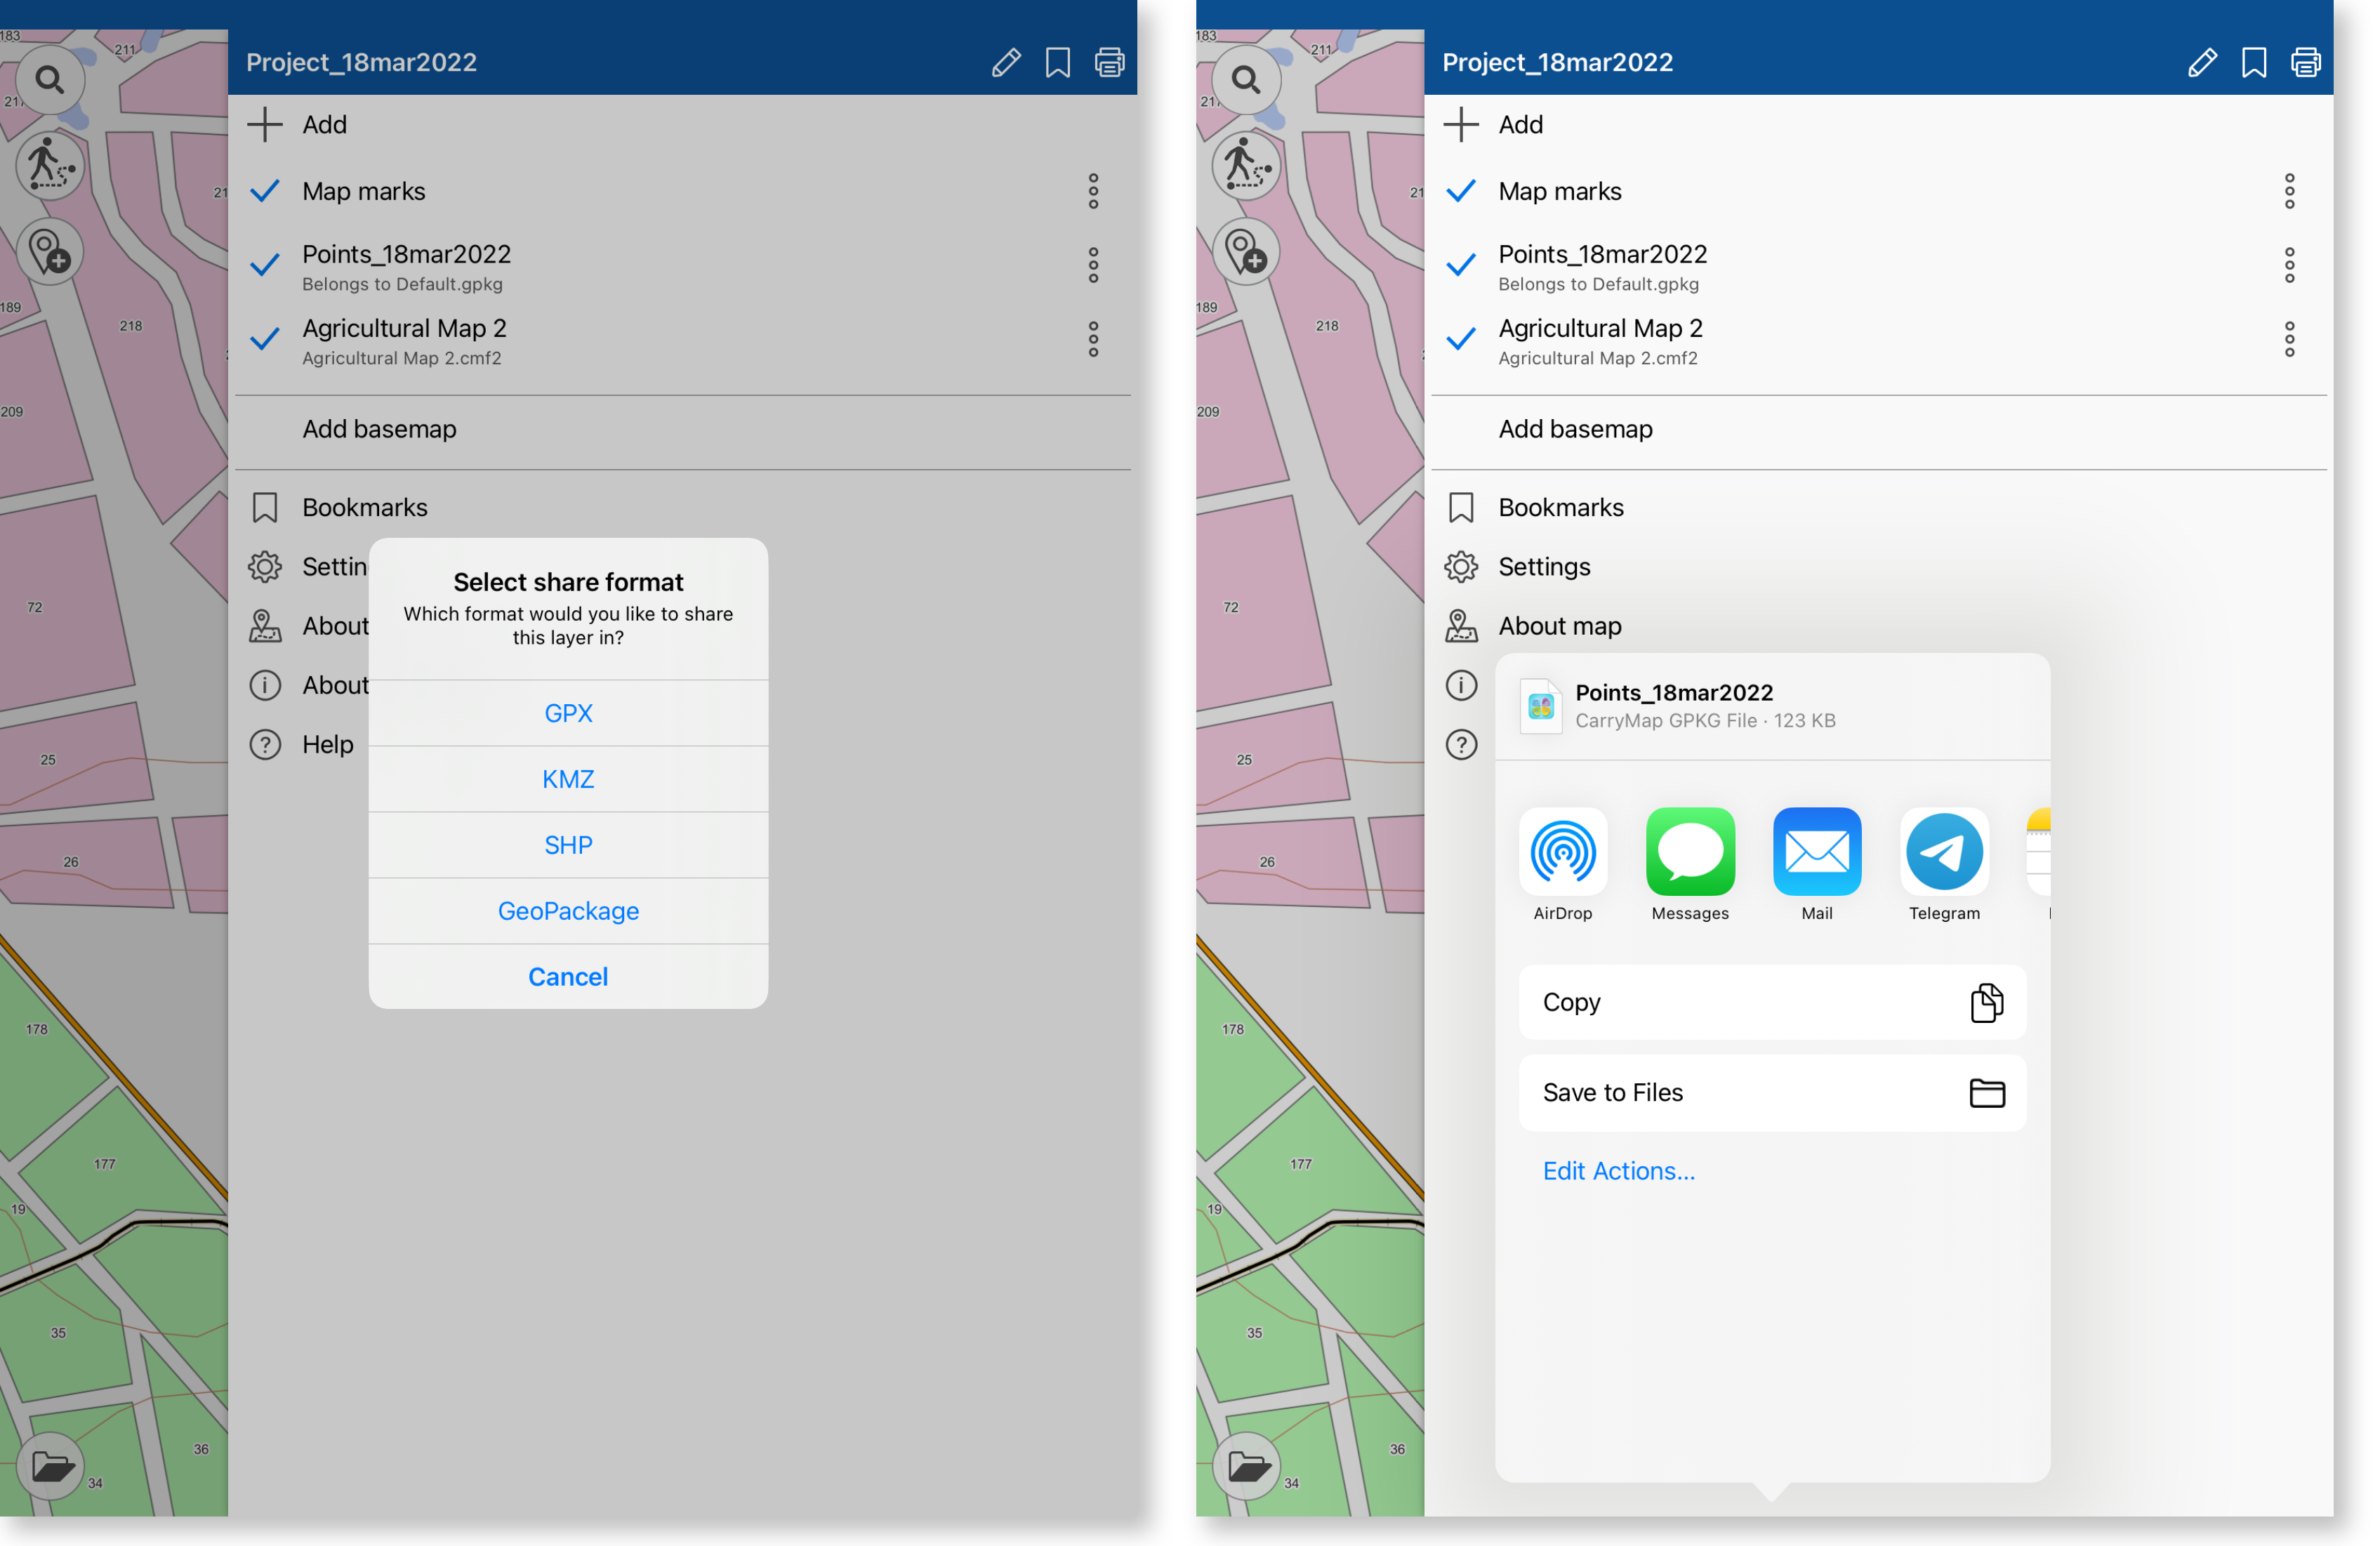
After you finished the data collection and added all required features to your map, you need to deliver this data to your office, so that your colleagues could start processing it. Export collected data pushing the ‘Share’ button next to the data layer in the CarryMap app. Then select share format from the appeared list: SHP, GeoPackage, KML/KMZ, and send the received file using any convenient method.
Import collected data to ArcGIS
Now you need to import all collected data to the desktop computer with ArcGIS installed in order to continue working with it in the office. After downloading the file to your machine use the CarryMap Builder ‘Import from GPKG’ tool provided to import data to ArcGIS geodatabase.
Enable ‘Import from GPKG’ from CarryMap Builder toolbar, select layers you want to import, specify output geodatabase, and run the process. Once the import process is complete, you can access the data using standard ArcGIS means and so continue working with your map.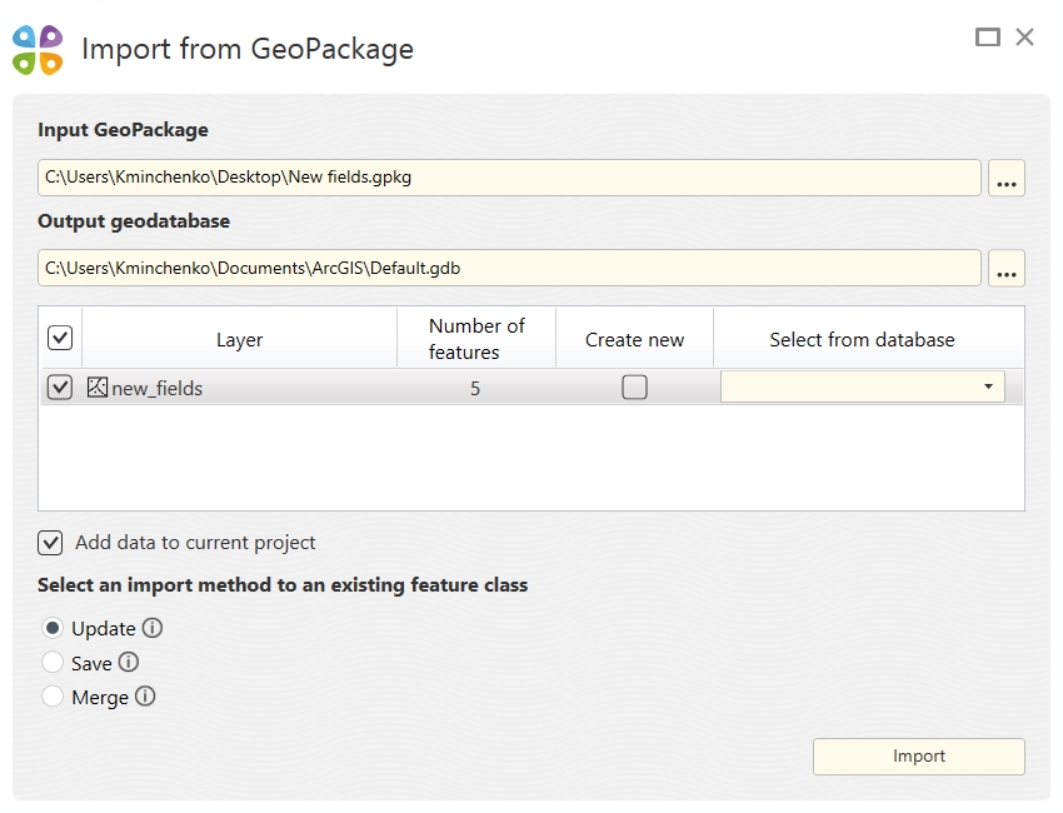
Try CarryMap Builder and create your own maps for free for 14 days!
Download free CarryMap app for Android and iOS to work with your mobile maps.


